Login
To login on the platform click on the following button:

The system will display a page with this section

To perform the login you'll have to insert your username (or email) and password in the corresponding input fields.
If you don't remember your password you can try to recover it clicking on (Forgot Password?)
Your Page
In the "Your Page" section you can handle all your registries and see the list of all your applications to the grants/programs.
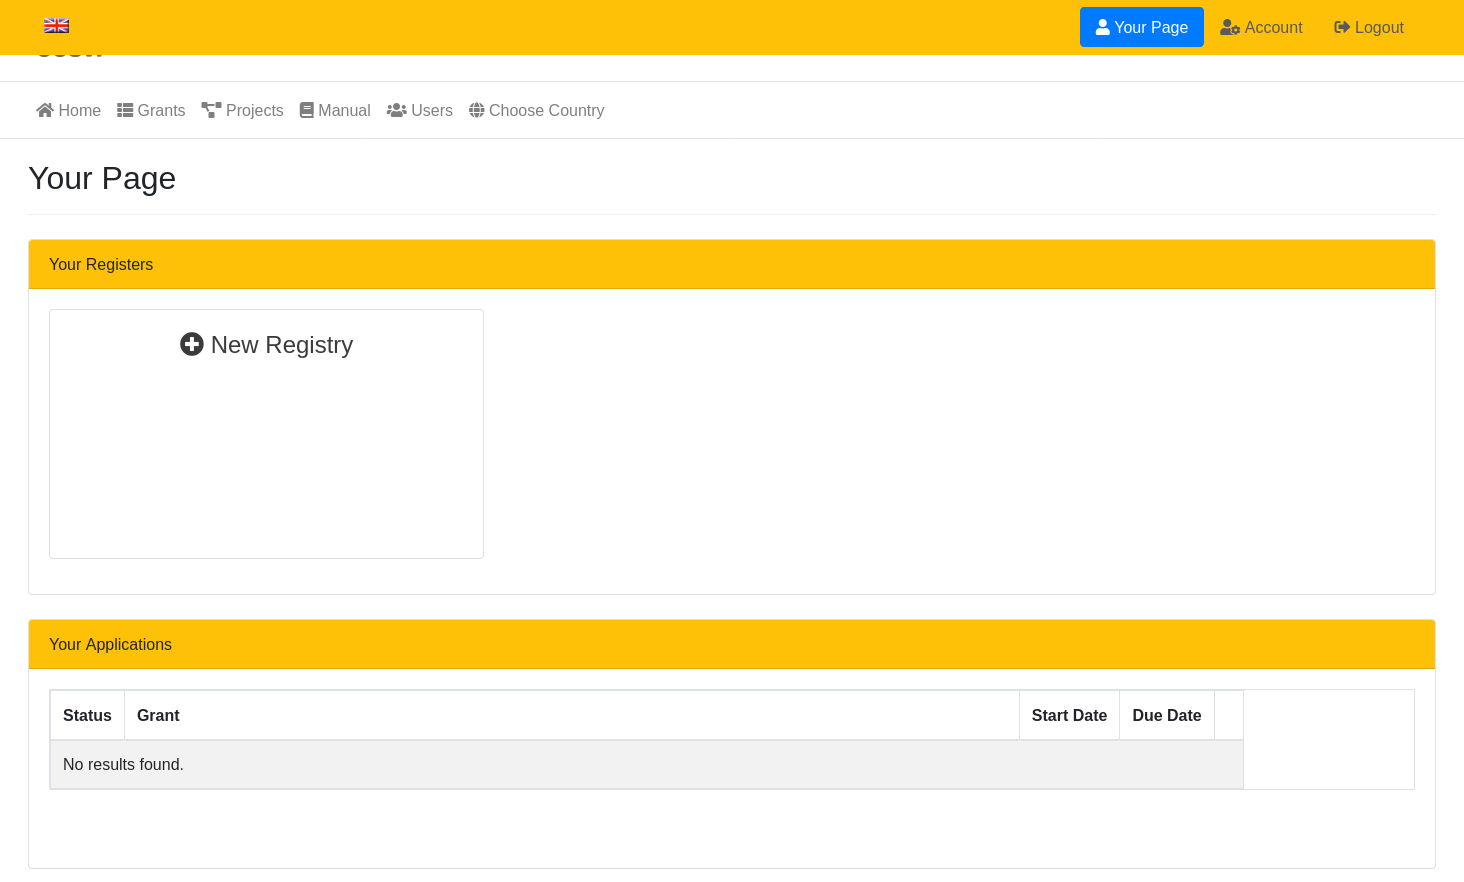
You can access the summary of the application by clicking the "View" button of the corresponding row.
Create a new registry
As shown in the previous picture, it is possible to create a new registry by clicking on the box containing the "New Registry" button; the next interface allows the user to select the registry type and to enter all the required information for such typology. The following image shows an example of new registry with all fields already filled in.

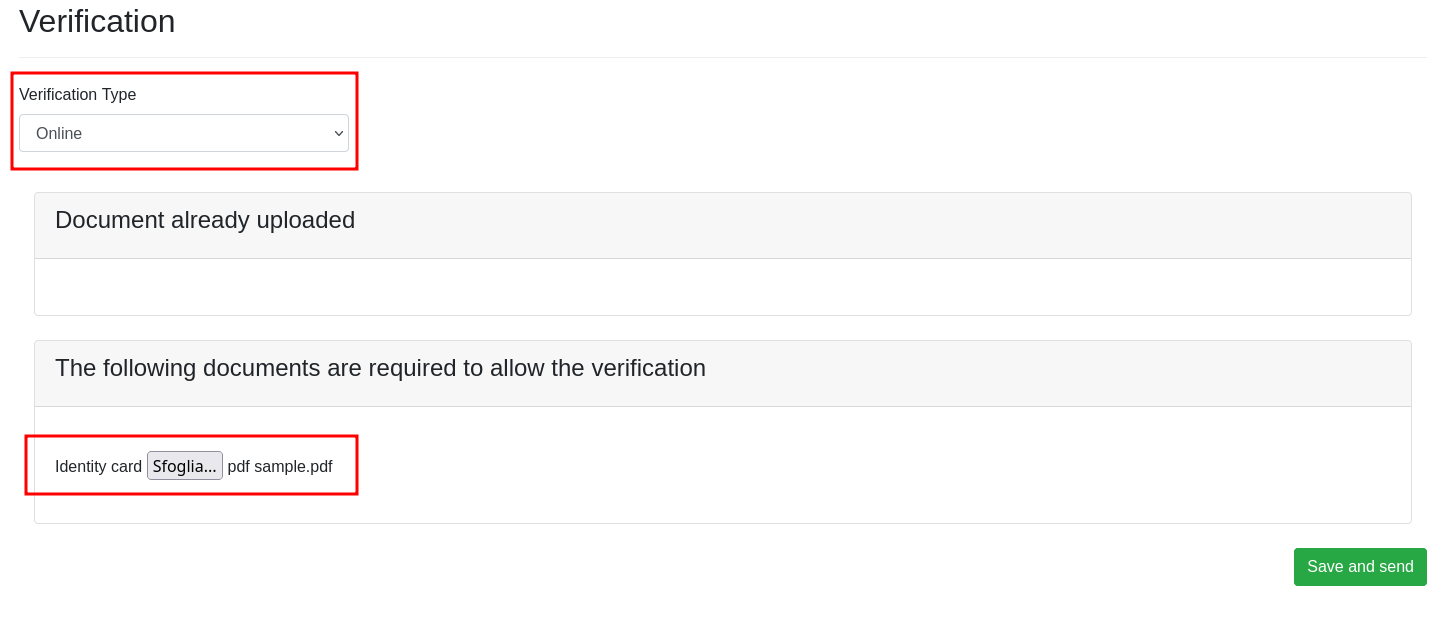
At the end of the page, the form requires to select a document type and to enter the related information; this document will be verified in the next steps. The "Save" button allows the user to conclude the creation phase.
Insert and verify documents
After saving, the website will immediately show an interface for checking the specified documents. In this page the user has the possibility to choose the verification type and, for the online verification, he/she has the possibility to upload an image/file for each required document.
After clicking on the "Save and Send" button, the website will redirect again to the initial user homepage, showing the new registry created.
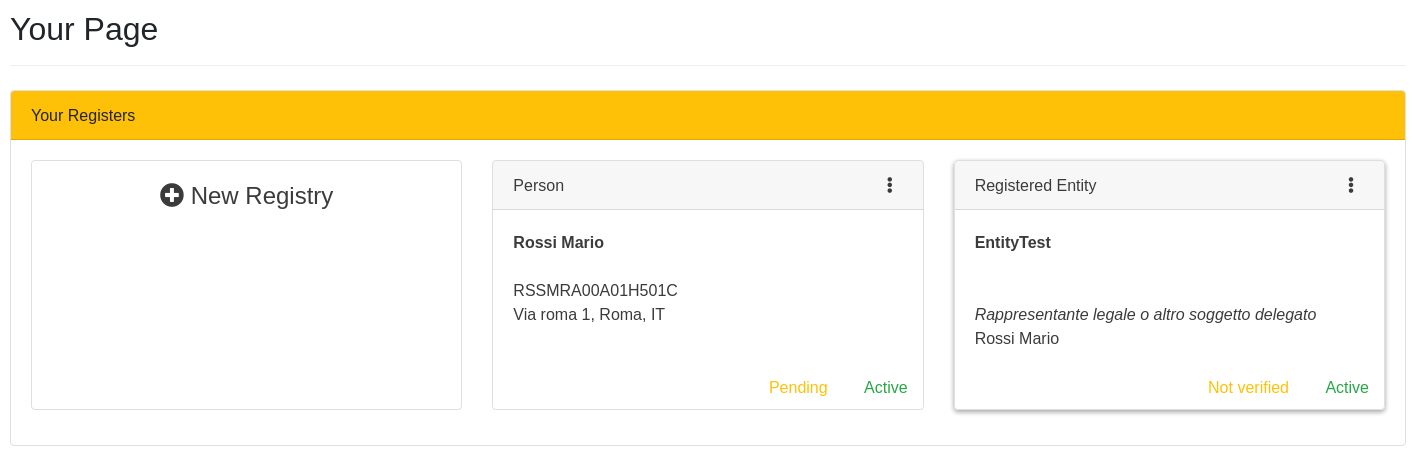
The document uploading phase can also be done later. In this case, the registry will be classified as "Not verified". As soon as the documents will be uploaded, the registry status will be updated into "Pending". After this creation step, a back-end operator will verify the uploaded documents and he/she will be able to change the status into "Verified" (whether all the checks have a positive result) or "Refused" (whether any checks are unsuccessful). The user has the possibility to modify his/her data and to reload documents at any time, but any change will modify the registry status into "Pending" and a new verification will be performed again.
Application Page
In the application page you'll se on the top the "action" buttons and under those the summary of the application.
The sections of the summary are:
- Your Application: general data about the application
- Available Downloads: if available, the documents you can download
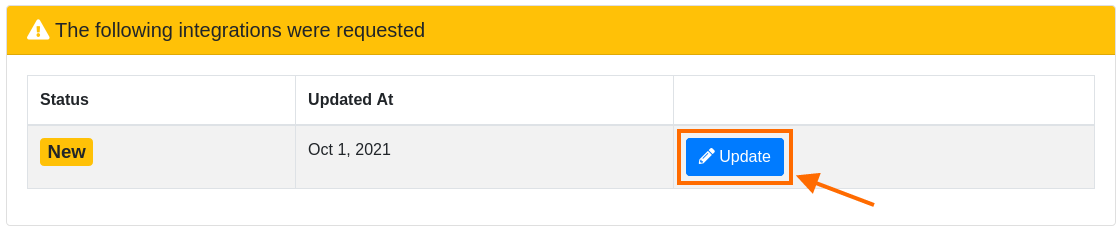
- Integration Requests Panel: if an integration request was open for you application it will appear in this list, based on its status it will be available the update or view button for each request
- The sections of the application form: the data you filled in the application form grouped by sections
Integration Requests
From the integrations section you can access the form to fill in the request, by clicking the "Update" button:
Once, in the request form you'll be presented with a form sub-divided in the following sections:
- Notes: notes given by the evaluator to help you with the filling process
- Questions: open question to which you'll have to give a textual answer
- Documents: documents to be uploaded
Please, note that not all questions and documents are required to complete the request.
Once all the requested questions and documents are filled in, it will appear on the application page a message like the following:

Simply press on the "Complete" button to set the integration as "completed" and send it to the evaluator that will then proceed to accepted or refuse it.